Your cart is currently empty!
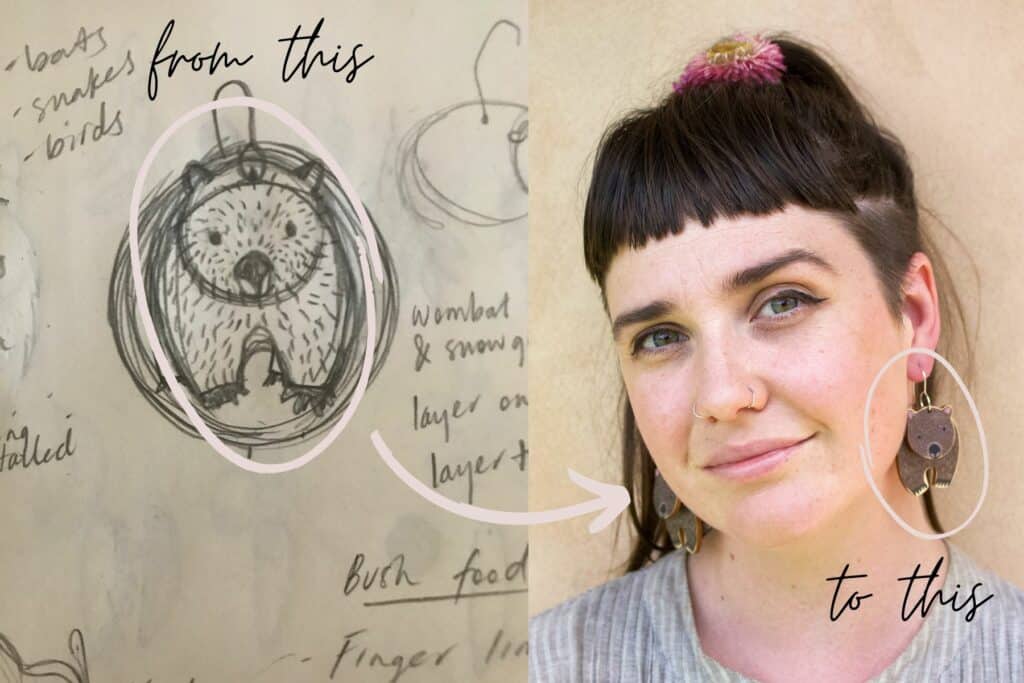
From Sketch to Earring: The Creative Process
Lately, I’ve had the pleasure of bringing my hand-carved stamps to markets with me, offering folks a glimpse into my creative process. It’s been delightful seeing their excitement as they match the stamps to the finished earrings. Being able to share the process has been really lovely for me to connect with the community and have people interested in how something is made is a lovely gift for me.
So I thought I’d take you on the creative process from the initial sketch to the final product here too.
Sketching
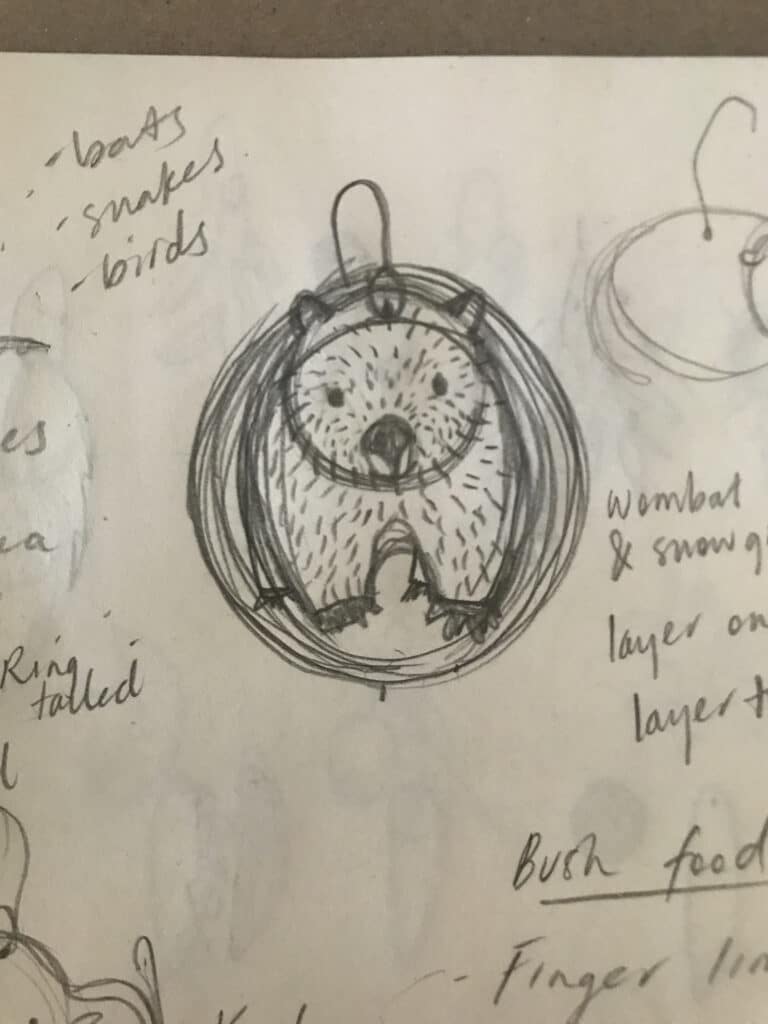
It all begins in my trusty sketchbook, which, let’s be real, is far from those Instagram-worthy ones filled with vibrant illustrations. I stick to my tried-and-true sketch books, sketching away with a trusty 2B pencil. My pages are a chaotic mix of scribbles, mind maps, and random words, a real brain dump!
Once the initial brainstorming frenzy settles, I sift through the chaos to unearth a few gems. I usually search google images for reference points – something I know a lot of people feel isn’t what a true artist does. But you know what, I’m all for whatever it takes to get the creativity flowing. I’ll never copy someones photo exactly and then sell it as my own… always seek permission before you do that! But to make sure I understand the proportions of something like a wombat I’ll check my sketches against reference photos.
But here’s the thing: there’s a fine line between letting ideas marinate and overthinking them to oblivion. Too much time spent in my head can lead to unrealistic expectations, stifling the flow of creativity. So it can be a bit of a balancing act, allowing ideas to grow without suffocating the spontaneity.
Carving
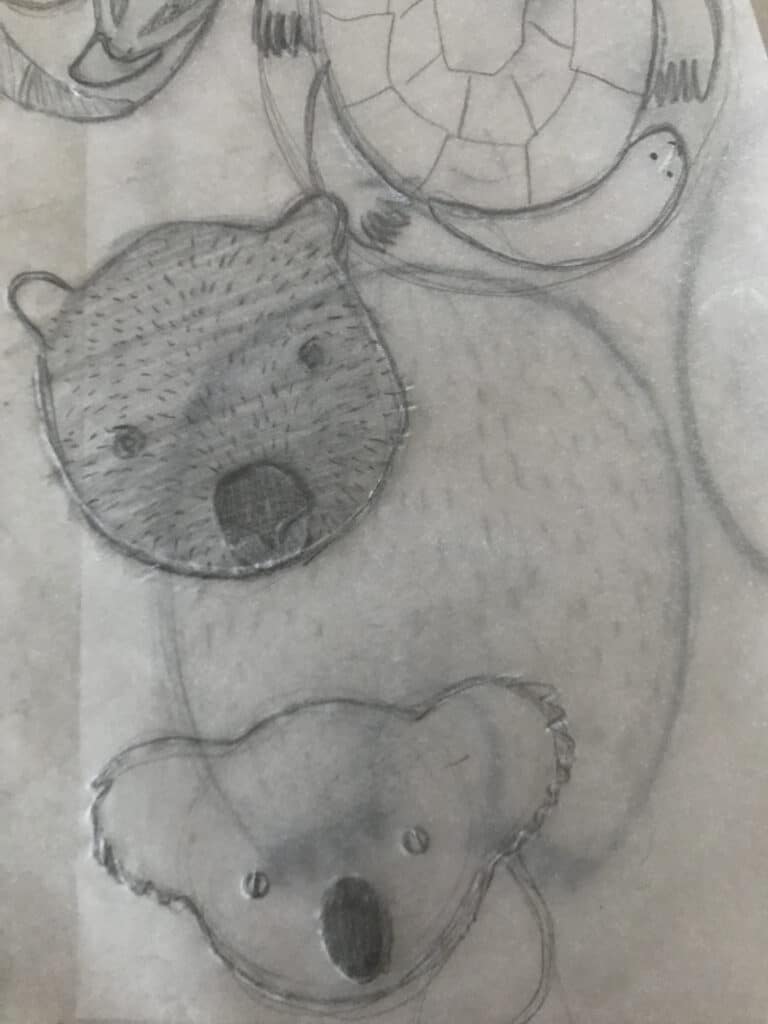
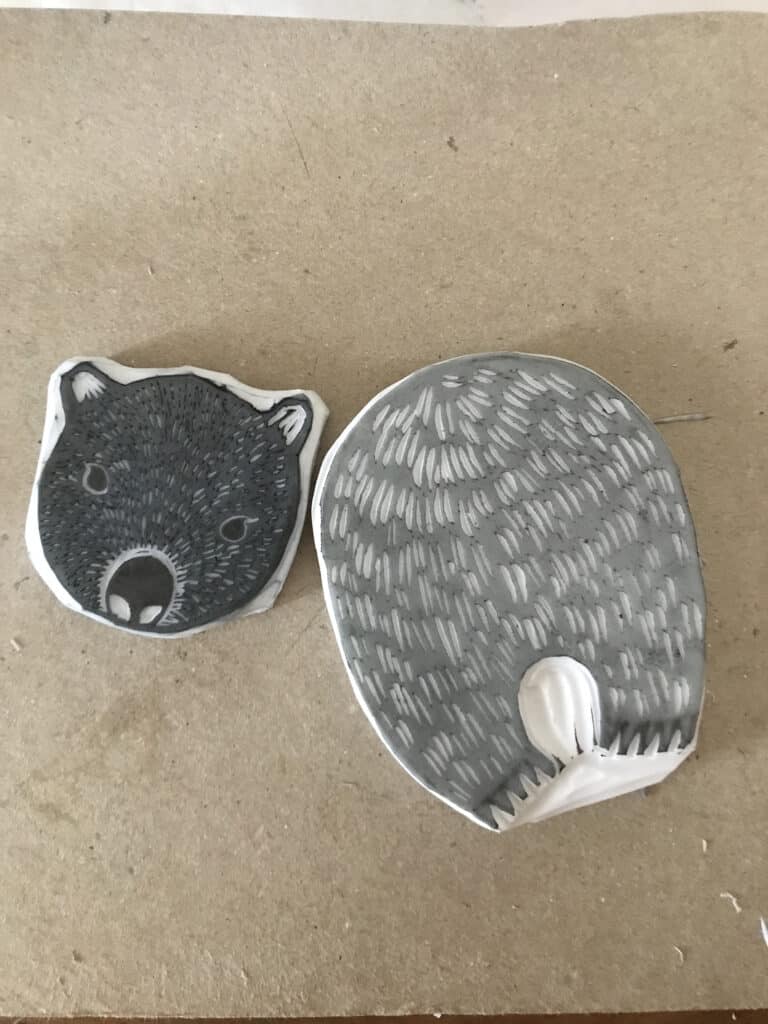

Next comes the stamp carving, a process I find very therapeutic. Armed with rubber blocks and carving tools, I transfer my design and start chiseling away. It is a meticulous process, one where I have to have a good understanding of where I need to carve away and what I need to leave. I’ll do a test print and carve away any bits I need to fix up.
I chose to limit myself to earrings that are created by hand carving stamps because I want them to have a hand made feel even though they are digitally printed. The boldness of a block print and the fact that in its beginning stages came from a hand carved stamp translates to the final earring even though in their final form they aren’t handmade.
Photoshop
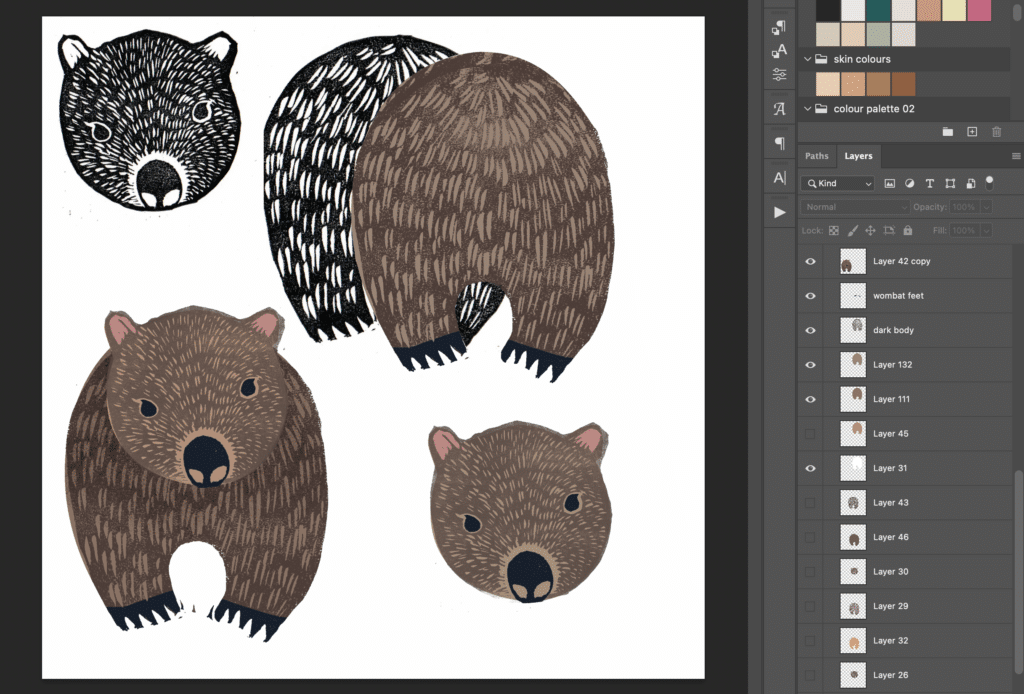
Now, for the digital magic! I choose to colour my designs digitally because time is a factor for me and carving a stamp for each colour is not something I want to do. So I print my stamp, scan it, open in photoshop and add colours. I try to keep the colours and design true to the aesthetics of block printing, using textured brushes and limited colour palettes. I create a mirror image of each design so that when the earrings are made they have that extra bit of detail.
MAKING
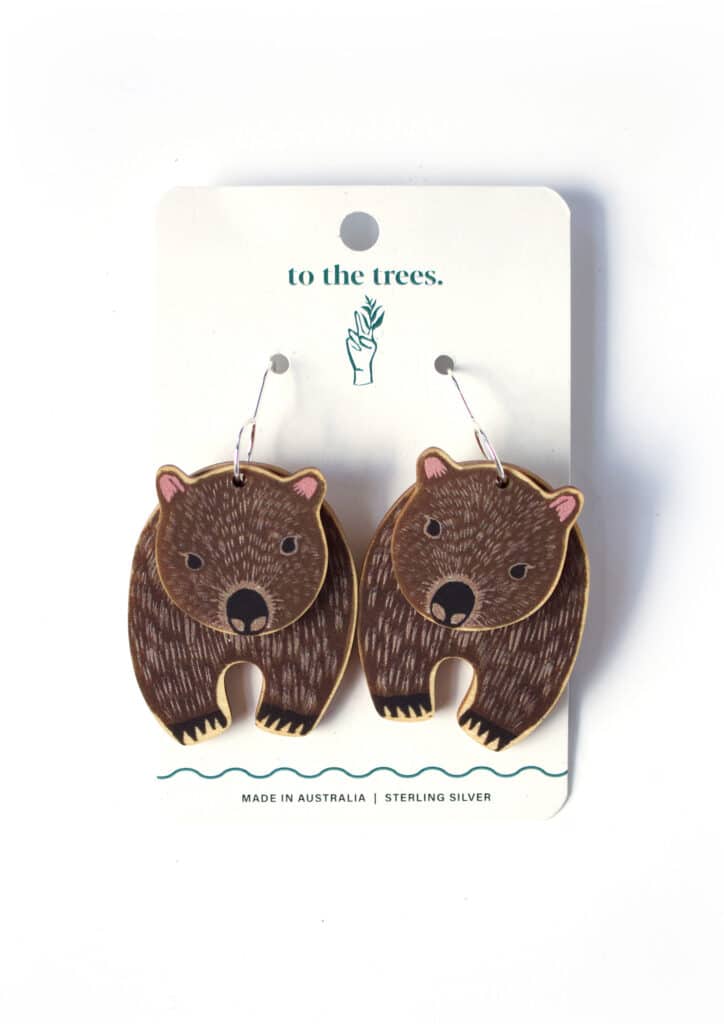
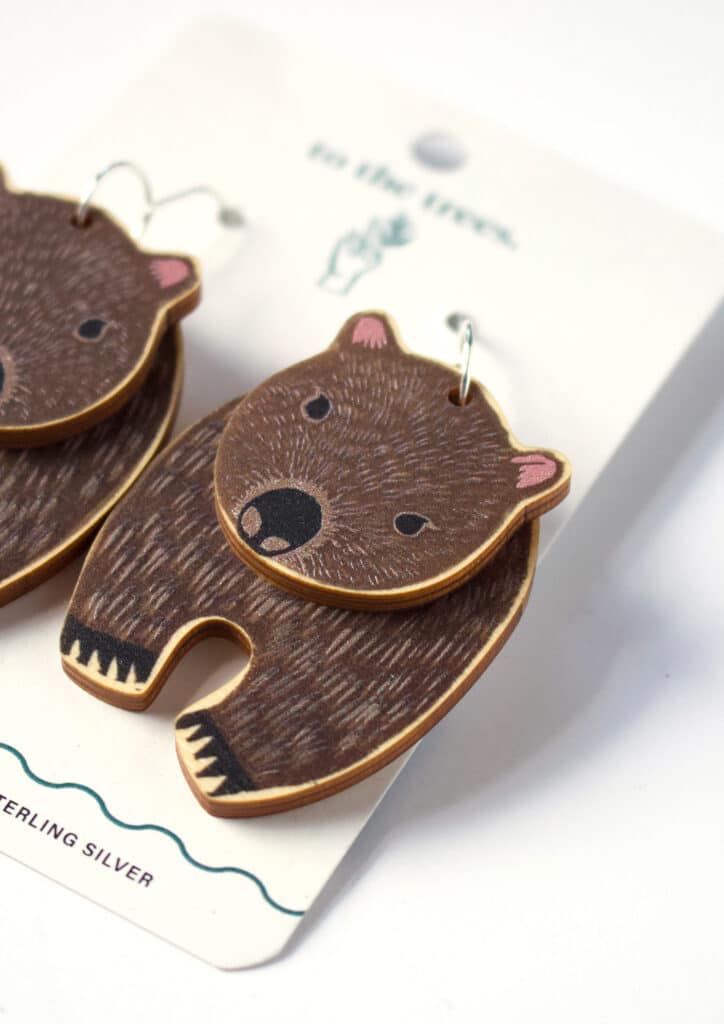
With the digital files ready, I send them off to my trusted manufacturers in Melbourne. They work their laser-cutting and UV printing magic, sending the pieces back to me. Then, it’s over to my studio assistant, Amalie, to assemble and package the orders with care.
And there you have it—a glimpse into the creative process of how a humble pencil sketch transforms into a wearable piece of art.
PS. WORKSHOPS
Speaking of stamp making! Would you be interested in attending a beginner stamp making workshop? I’ll be running workshops again at Fire and Flood in Wentworth Falls and also developing some online resources! Make sure you’re signed up to my newsletter to keep up to date!